“When I was a player, the trainers and doctors did a good job at helping me manage my injuries early on. The strength coaches really helped me get my strength and fitness back later on. But I felt that the grey space in between and knowing how to progress on the court was the missing link.”
Anonymous NBA Executive
What You Will Learn
- How to guide athletes from initial treatment to full engagement in the weight room following an injury.
- A four-stage model – Prep, Prime, Groove, and Load – that integrates motor learning and sensory input.
- How manual therapy and assisted exercises are used to help athletes understand and feel the correct movements and positions.
A front office executive and a former player once shared this insight with me years ago. This conversation, and effectively a problem, has been the center of my rehab and return to play processes. I enjoy solving this problem of sequencing rehab from the table to the weight room.
It’s one big puzzle and at my core I am a problem solver. I’ve created a mental model of Prep, Prime, Groove, and Load as a solution to this problem. Each of these categories touches upon some aspect of motor learning and sensory input as the athlete transitions from the treatment table to the weight room.
For context purposes, I am going to utilize the goal of progressing an athlete who is coming from a lateral ankle sprain. My emphasis here will be progressing exercise in the lateral vector as a precursor for change of directions.
PREP: MANUAL THERAPY CREATES AN OPPURTUNITY TO LEARN
One perspective I have on manual therapy is that it teaches an athlete what they are supposed to find and feel during certain exercises. Sometimes an athlete cannot get into a particular position. Manual therapy is the equivalent of “I am going to show you what this is supposed to feel like.” In physical therapy this would be considered passive range of motion or joint mobilizations.
When attacking the lateral vector, addressing the hip is my primary entry point. To accept our bodyweight going into a cut we need to be able to access relative hip internal rotation. The hip internal rotation allows us to then optimize our primary hip extensor & abductor, the gluteus maximus, when getting out of the cut. The internal rotation will create a momentarily lengthening of the gluteus maximus and via the stretch shortening cycle we can then propel ourselves out of the cut. If we have limited hip internal rotation, then the gluteus maximus cannot perform to its full capabilities.
Sling shot analogy
Imagine you have a sling shot – your gluteus maximus. If you only can pull the sling shot back halfway, then the rock that you’re trying to shoot forward is not going to go too far. That’s what limited hip internal rotation looks like. If you can increase hip internal rotation, then you are able to pull that sling shot back further and launch the rock further.
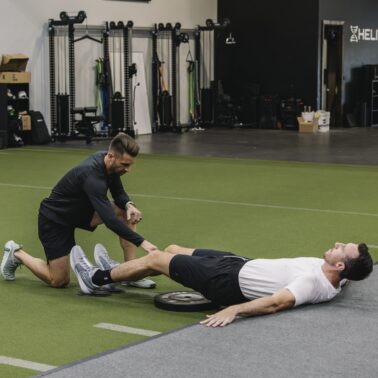
I utilize manual therapy to Prep getting into a cut by approximating the femur into the acetabulum, which is relative hip internal rotation. As I do this, I am communicating with the athlete asking them “Do you feel a small stretch in the back of your hip where the back pocket of your jeans would be?” This stretch sensation comes from lengthening the gluteus maximus and other posterior hip connective tissue.
I am teaching them what it is to feel an ilium moving on a femoral head to create relative hip internal rotation. It is important we establish what this feels like because when we begin moving, I want them to feel the same thing.
PRIME: FINDING AND FEELING POSITIONS
After I have taught them the sensory component of getting into a cut, now it is time for us to do it together. The Prep phase was “I am going to show you” and the Prime phase is “We are going to do this together.” In physical therapy this Prime phase would be considered active assisted range of motion. From a motor learning perspective this is our part task strategy. We are breaking down a movement into its parts before we begin to challenge the whole task strategy of the movement.
In a similar position of side lying, I will begin to approximate the femur into the hip. I will move their leg in and out of this position. This is the equivalent of getting into and out of a cut. Eventually I will ask the athlete to start doing this action with me. My hands and verbal cues begin to serve as the training wheels as they start to pedal the bicycle. A common phrase people may label this action is a “hip shift.” As they are practicing the hip shift, I am constantly asking them if they can feel that back pocket stretch similar to the Prep phase.
You can challenge the hip shift by transitioning them to half kneeling, staggered stance, or split stance positions. The underlying principle of hip shifting never changes and I constantly am checking in that they are feeling a back pocket stretch to ensure that are feeling the correct position.
GROOVE: LEARNING THE MOVEMENT
Sequencing rehab requires us to get on our feet. That’s where sport and performance live – not on the table. The Groove phase is about taking the training wheels off – my hands – and having the athlete ride the bike on their own by executing the movement with low to moderate loads. The Groove phase is whole task motor learning and is when the I say to the athlete “Show me how to do the movement on your own.” During this phase I still want the athlete to be conscious of their movements feeling the right things.
I prefer half kneeling positions because it reduces degrees of freedom and helps magnify lumbopelvic movements. Sequencing rehab for getting into a cut in the lateral vector generally includes some variation of a low-to-high or high-to-low cable stack movement.
Same principles apply in half kneeling. Find that back pocket. But if we cannot find the back pocket, then we must adjust my cueing or adjust the exercise. This is where my principle of experimenting is a part of my process. I do not always know which exercise or which cue is going to achieve the goal that I want. I will routinely change an exercise on the spot if the sensory component is not what I need to be. There’s 101 ways to teach getting into a cut. Find the one that works best for this athlete.
LOAD: CREATING AN ADAPTATION
Sequencing rehab needs load. Performance needs load. Successful rehab needs load. We can manipulate load by manipulating the speed or the absolute resistance of the load. The Load phase is traditional strength and performance training. During this phase I want the athlete to be mindful of what they are feeling. As we introduce speed and load, I encourage less thinking and more the vibe of “Just do it.” If we have done part in teaching the sensory component on the table and cueing the standing exercise, then this phase should take care of itself.
I am fan of fake medicine ball throws or band assisted decelerations. Both are creating a speed component of getting into the cut. Same principles apply – find that back pocket for a split second at the bottom of the cut. The Load phase is where my coaching becomes less internal cueing and more external cueing.
FINAL THOUGHTS
Prep: “I am going to show you what this exercise is supposed to feel like.”
Prime: “We are going to do this exercise together.”
Groove: “Show me how you know how to do this exercise.”
Load: “Just do it.”
Sequencing rehab is a critical component. It is what managing the grey space is all about.


